Approvals
An approval workflow puts a review step in front of provisioning. When a template is linked to an approval workflow, EasyLife 365 Mail collects the request, asks the approvers you defined, and only creates the shared mailbox, room mailbox, equipment mailbox or distribution list once the workflow completes.
Approvals are off by default. Turn them on in EasyLife 365 Admin under Settings → Approvals with the Enable Approvals switch. Until you do, the Approval flows menu entry, the template Approvals tab and the Manage → Approval Requests view are hidden.
Creating an approval workflow
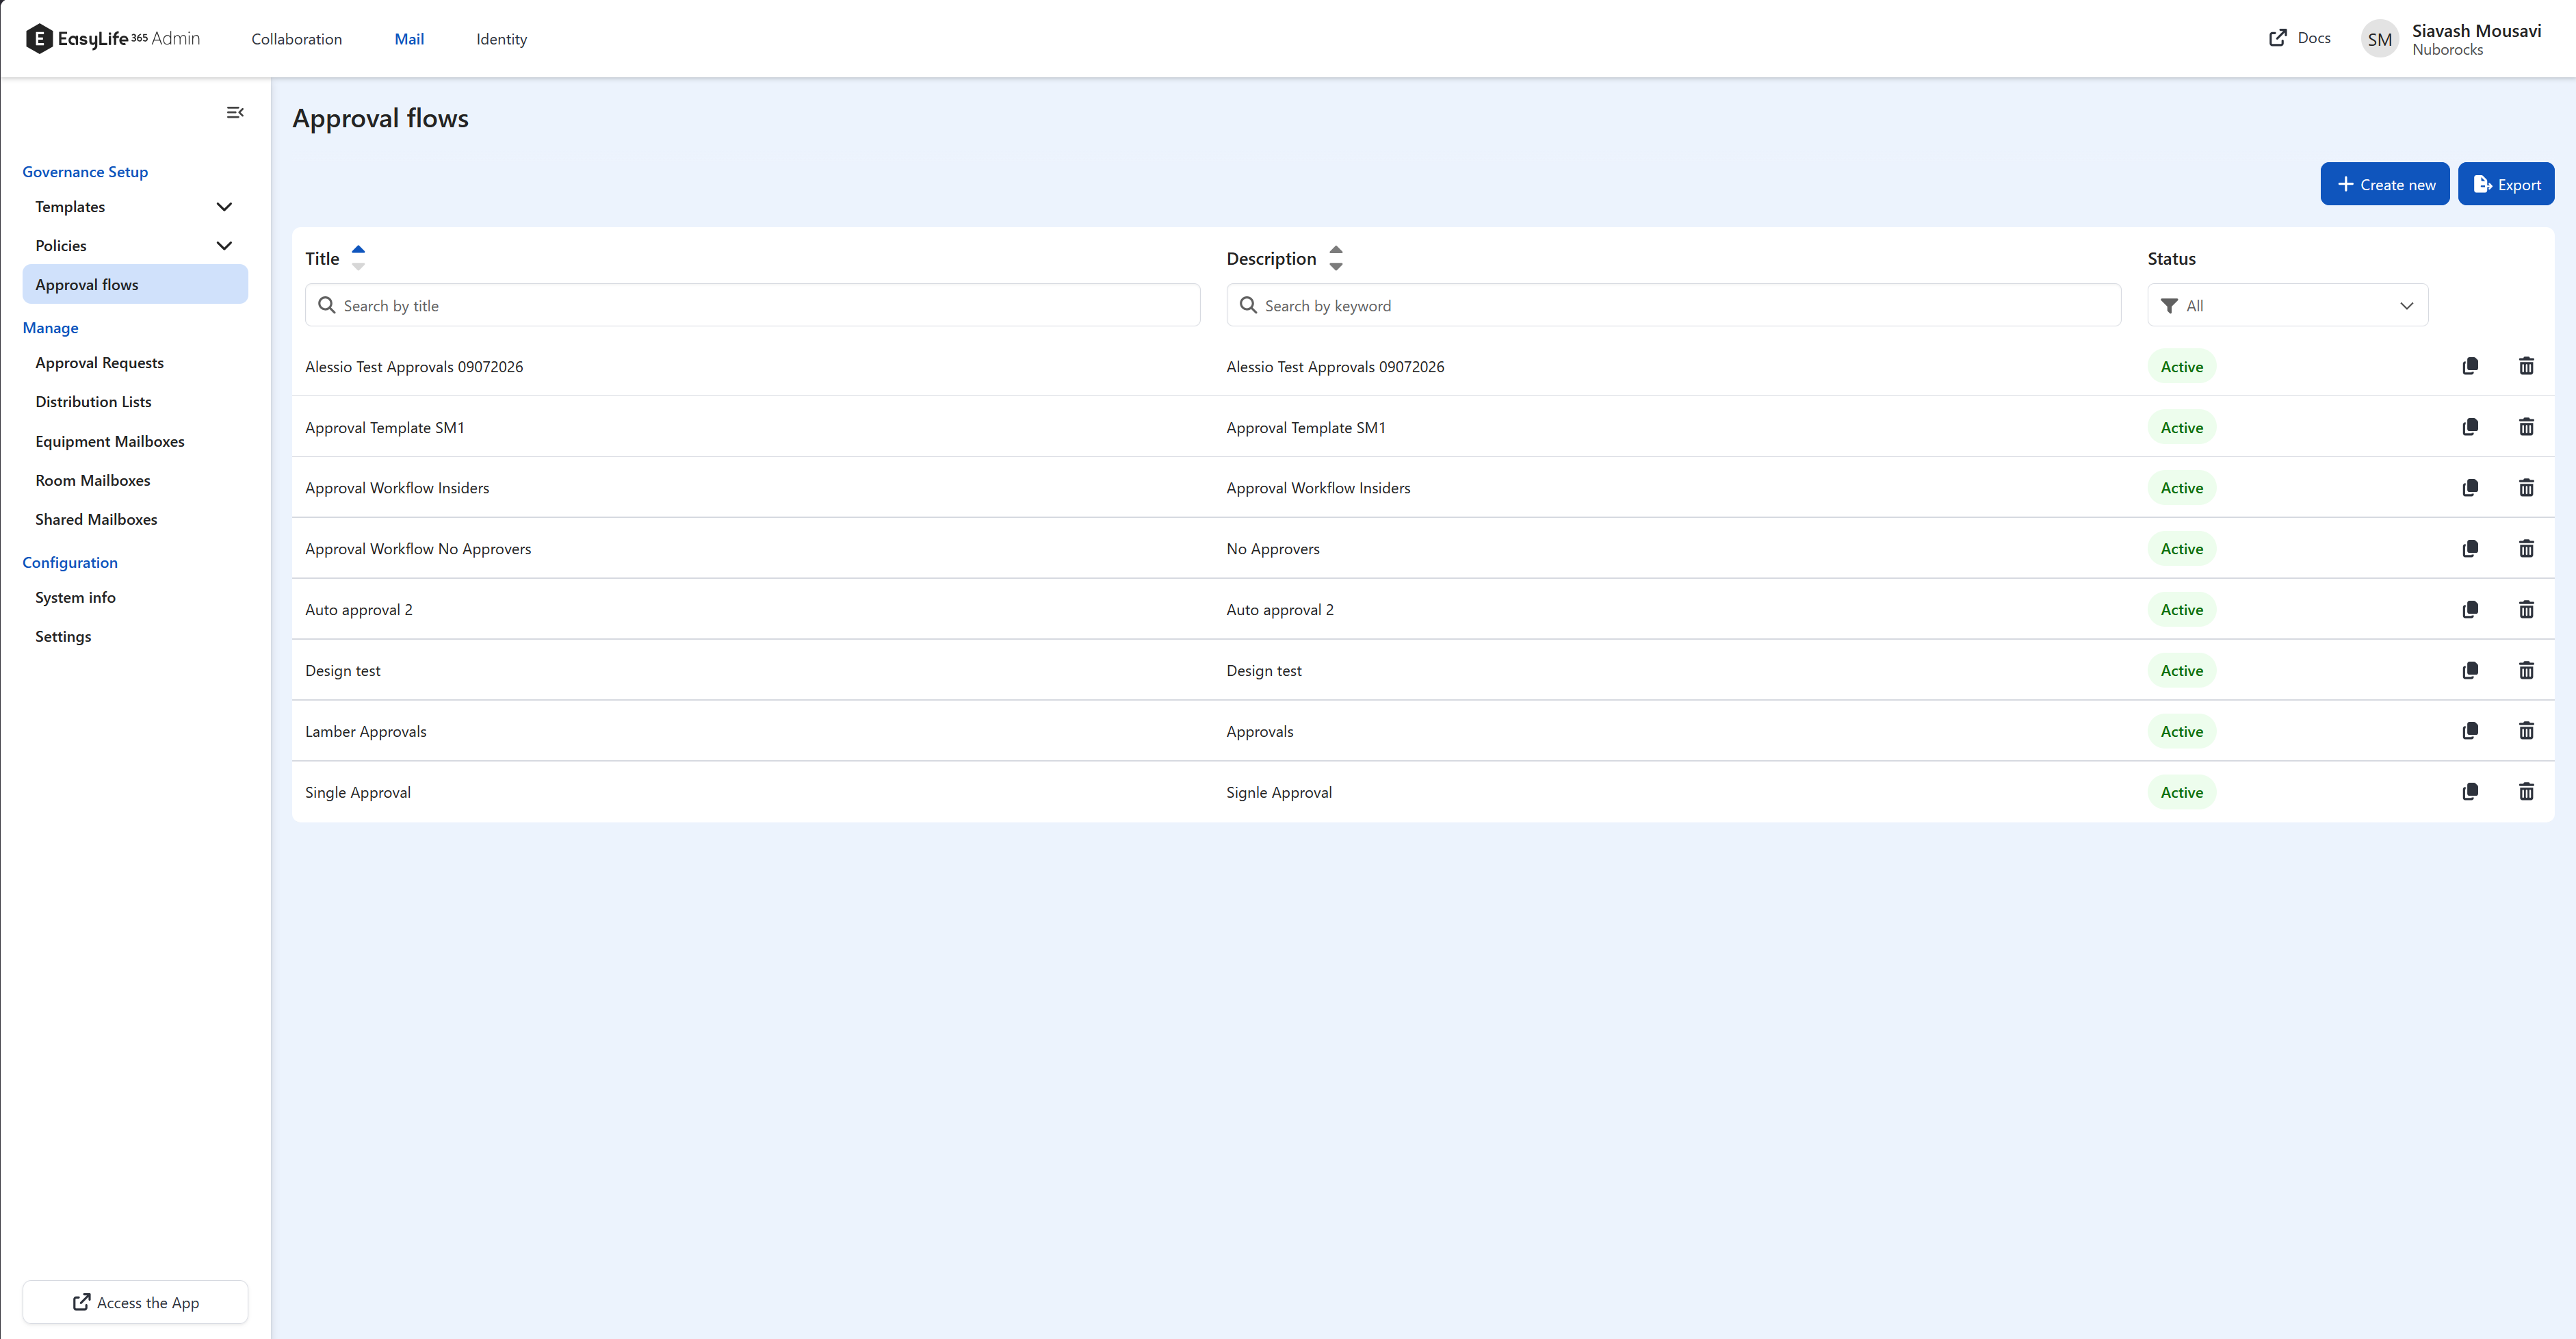
- Open EasyLife 365 Admin (https://admin.easylife365.cloud/mail)
- Navigate to
Governance Setup→Approval flows - Select Create new
An approval workflow is not tied to a resource type. The same workflow can be linked to a shared mailbox template and to a distribution list template.
General
The General tab holds the details of the workflow.
- Card Details — give the workflow a Title and a Description. Both are required, and the description is limited to 150 characters.
- Integrations — an optional Webhook. It is triggered when a request is created and when an approval stage is approved or rejected. See Approval webhooks for the payload.
- Behavior — two switches:
- Prevent self-approval excludes the requestor from the resolved approvers in all stages.
- Status activates the workflow. Only active workflows are honored.
Workflow
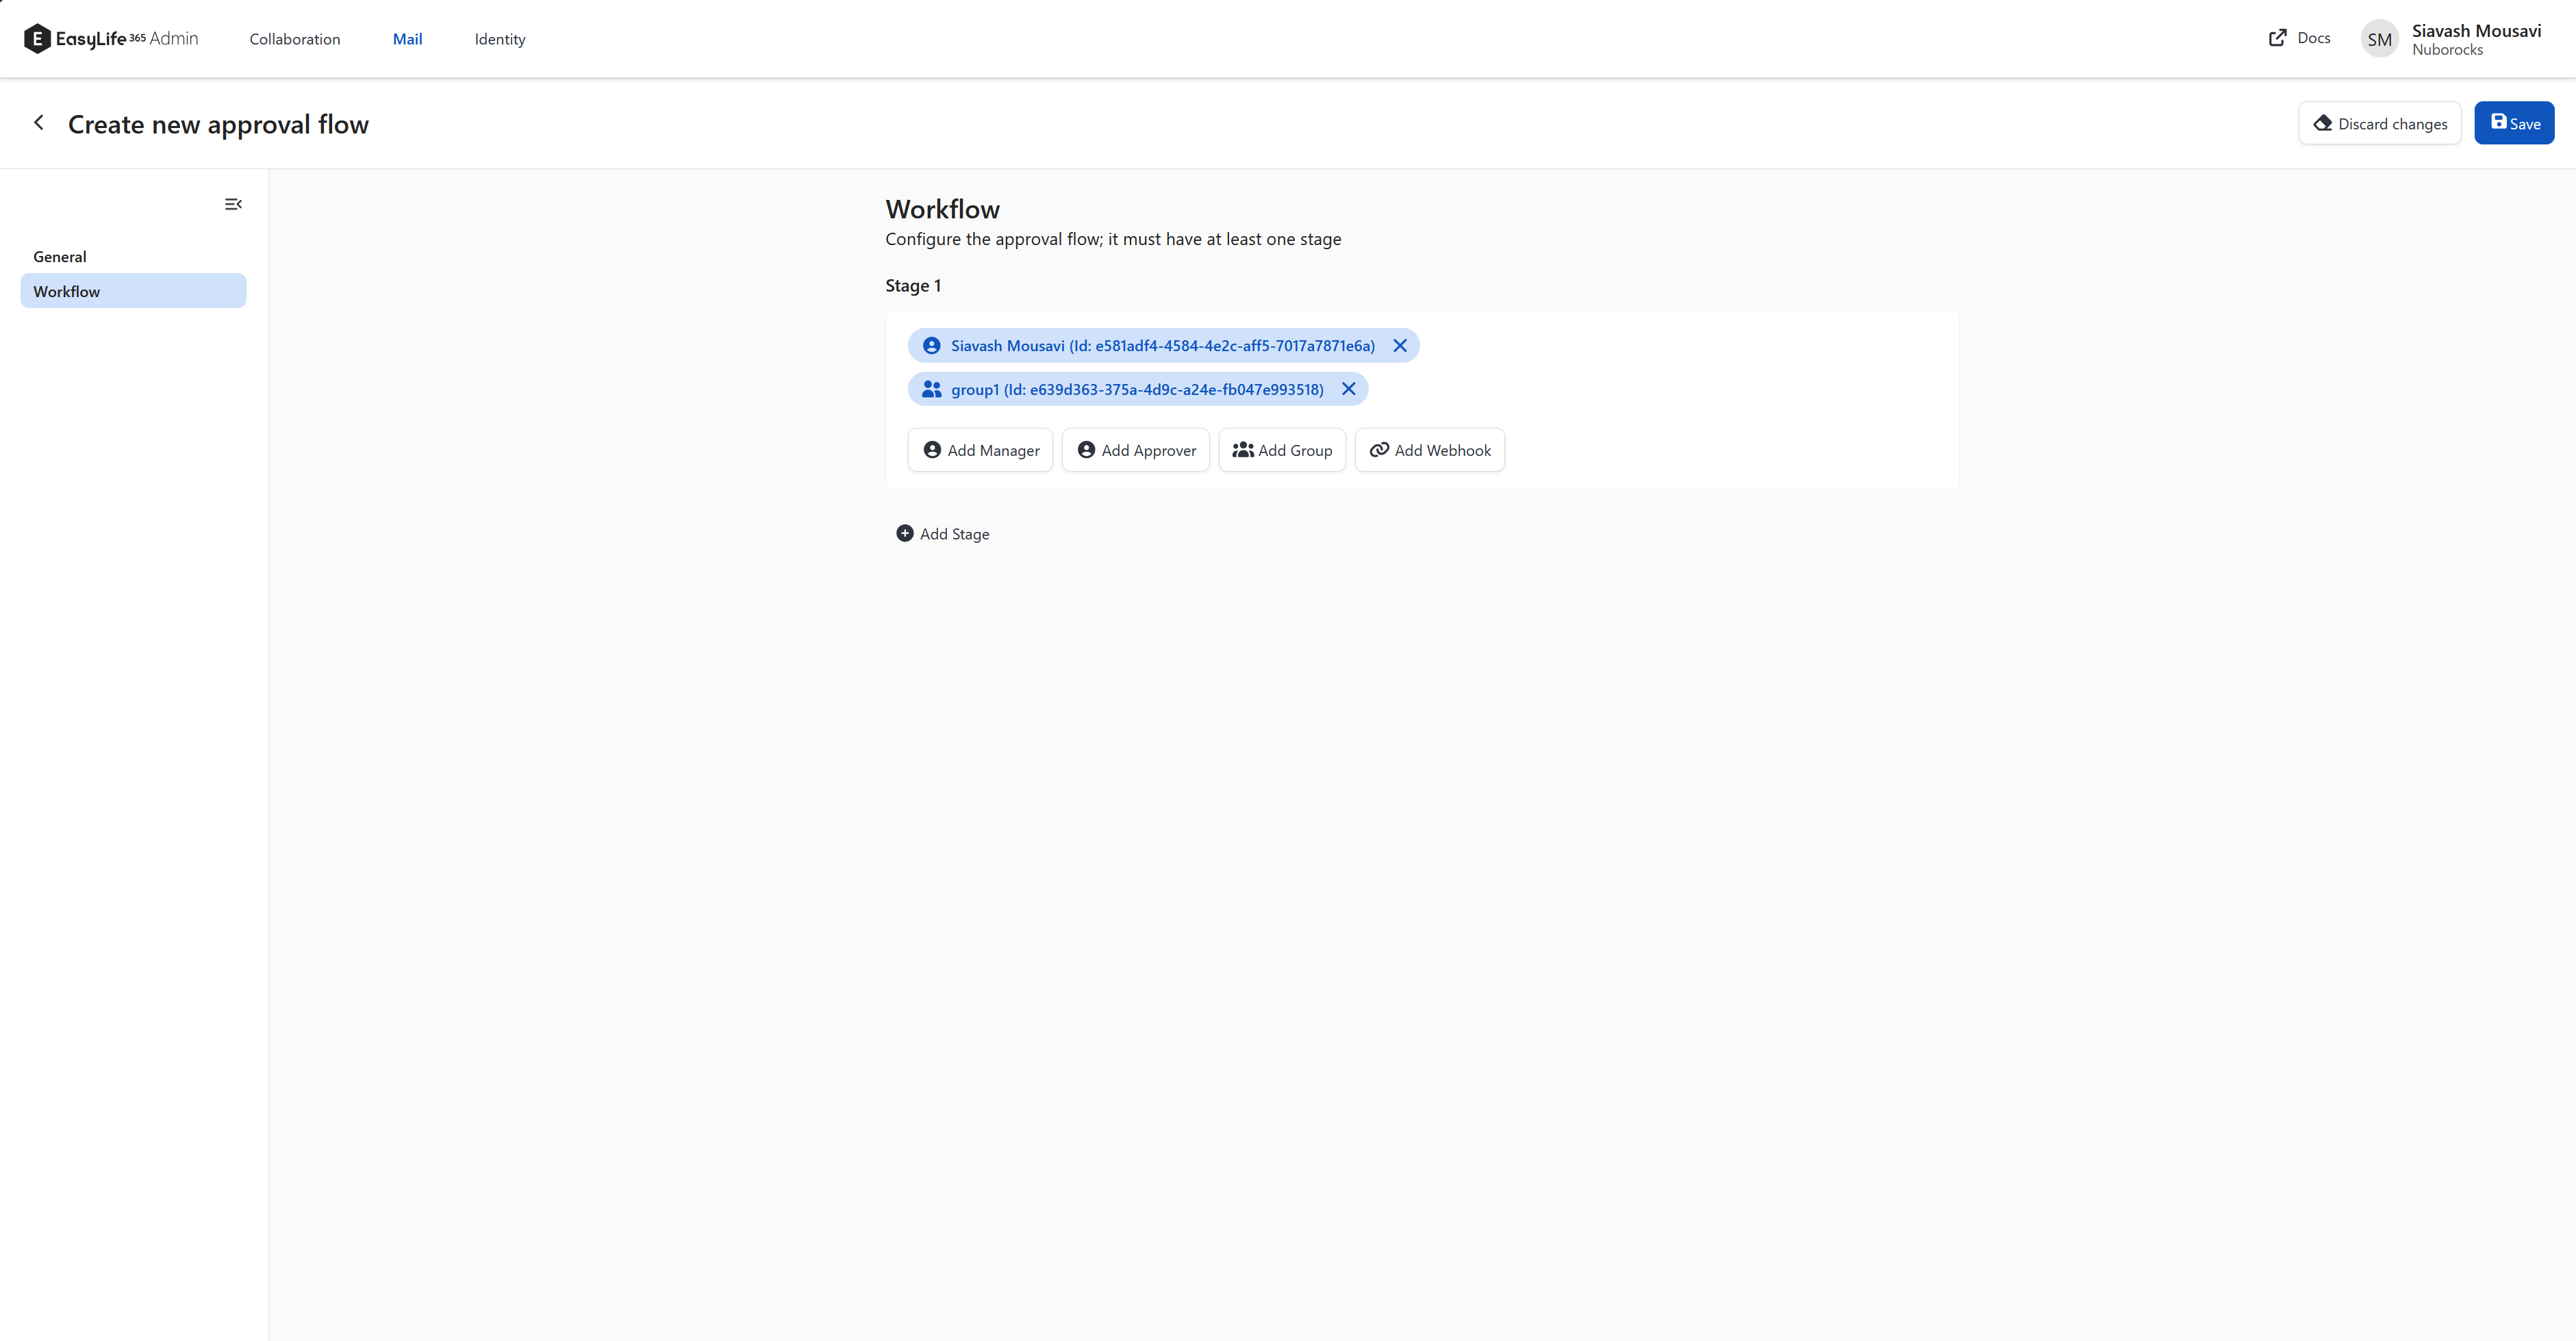
The Workflow tab defines who reviews the request. A workflow needs at least one stage and can have at most three. A stage completes as soon as any one of its approvers responds. When every stage is approved, EasyLife 365 Mail provisions the resource.
Add approvers to a stage with the buttons at the bottom of the stage card:
1. Add Manager — the requestor's manager, read from the Manager field in Microsoft Entra ID. Combine it with another approver, because nobody is added to the stage when the requestor has no manager. One manager per stage.
2. Add Approver — a specific person in your organization. Up to 15 per stage.
3. Add Group — every member of the selected security group can approve, including members of nested groups. Up to 5 per stage.
4. Add Webhook — a URL that returns the list of approver IDs. Up to 3 per stage. See Approval webhooks.
A stage whose approvers cannot be resolved is skipped. If no stage of the workflow resolves to anyone, the request is rejected and the requestor is notified, so make sure every workflow has at least one approver that can always be resolved.
Changes to a workflow apply to new requests only. Requests that are already in progress keep the version of the workflow that was active when they were created.
Approval requests are stored for 90 days. After that they are deleted regardless of their status.
Linking to templates
A workflow does nothing until a template points at it.
- Open a template under
Governance Setup→Templates. - Select the Approvals tab.
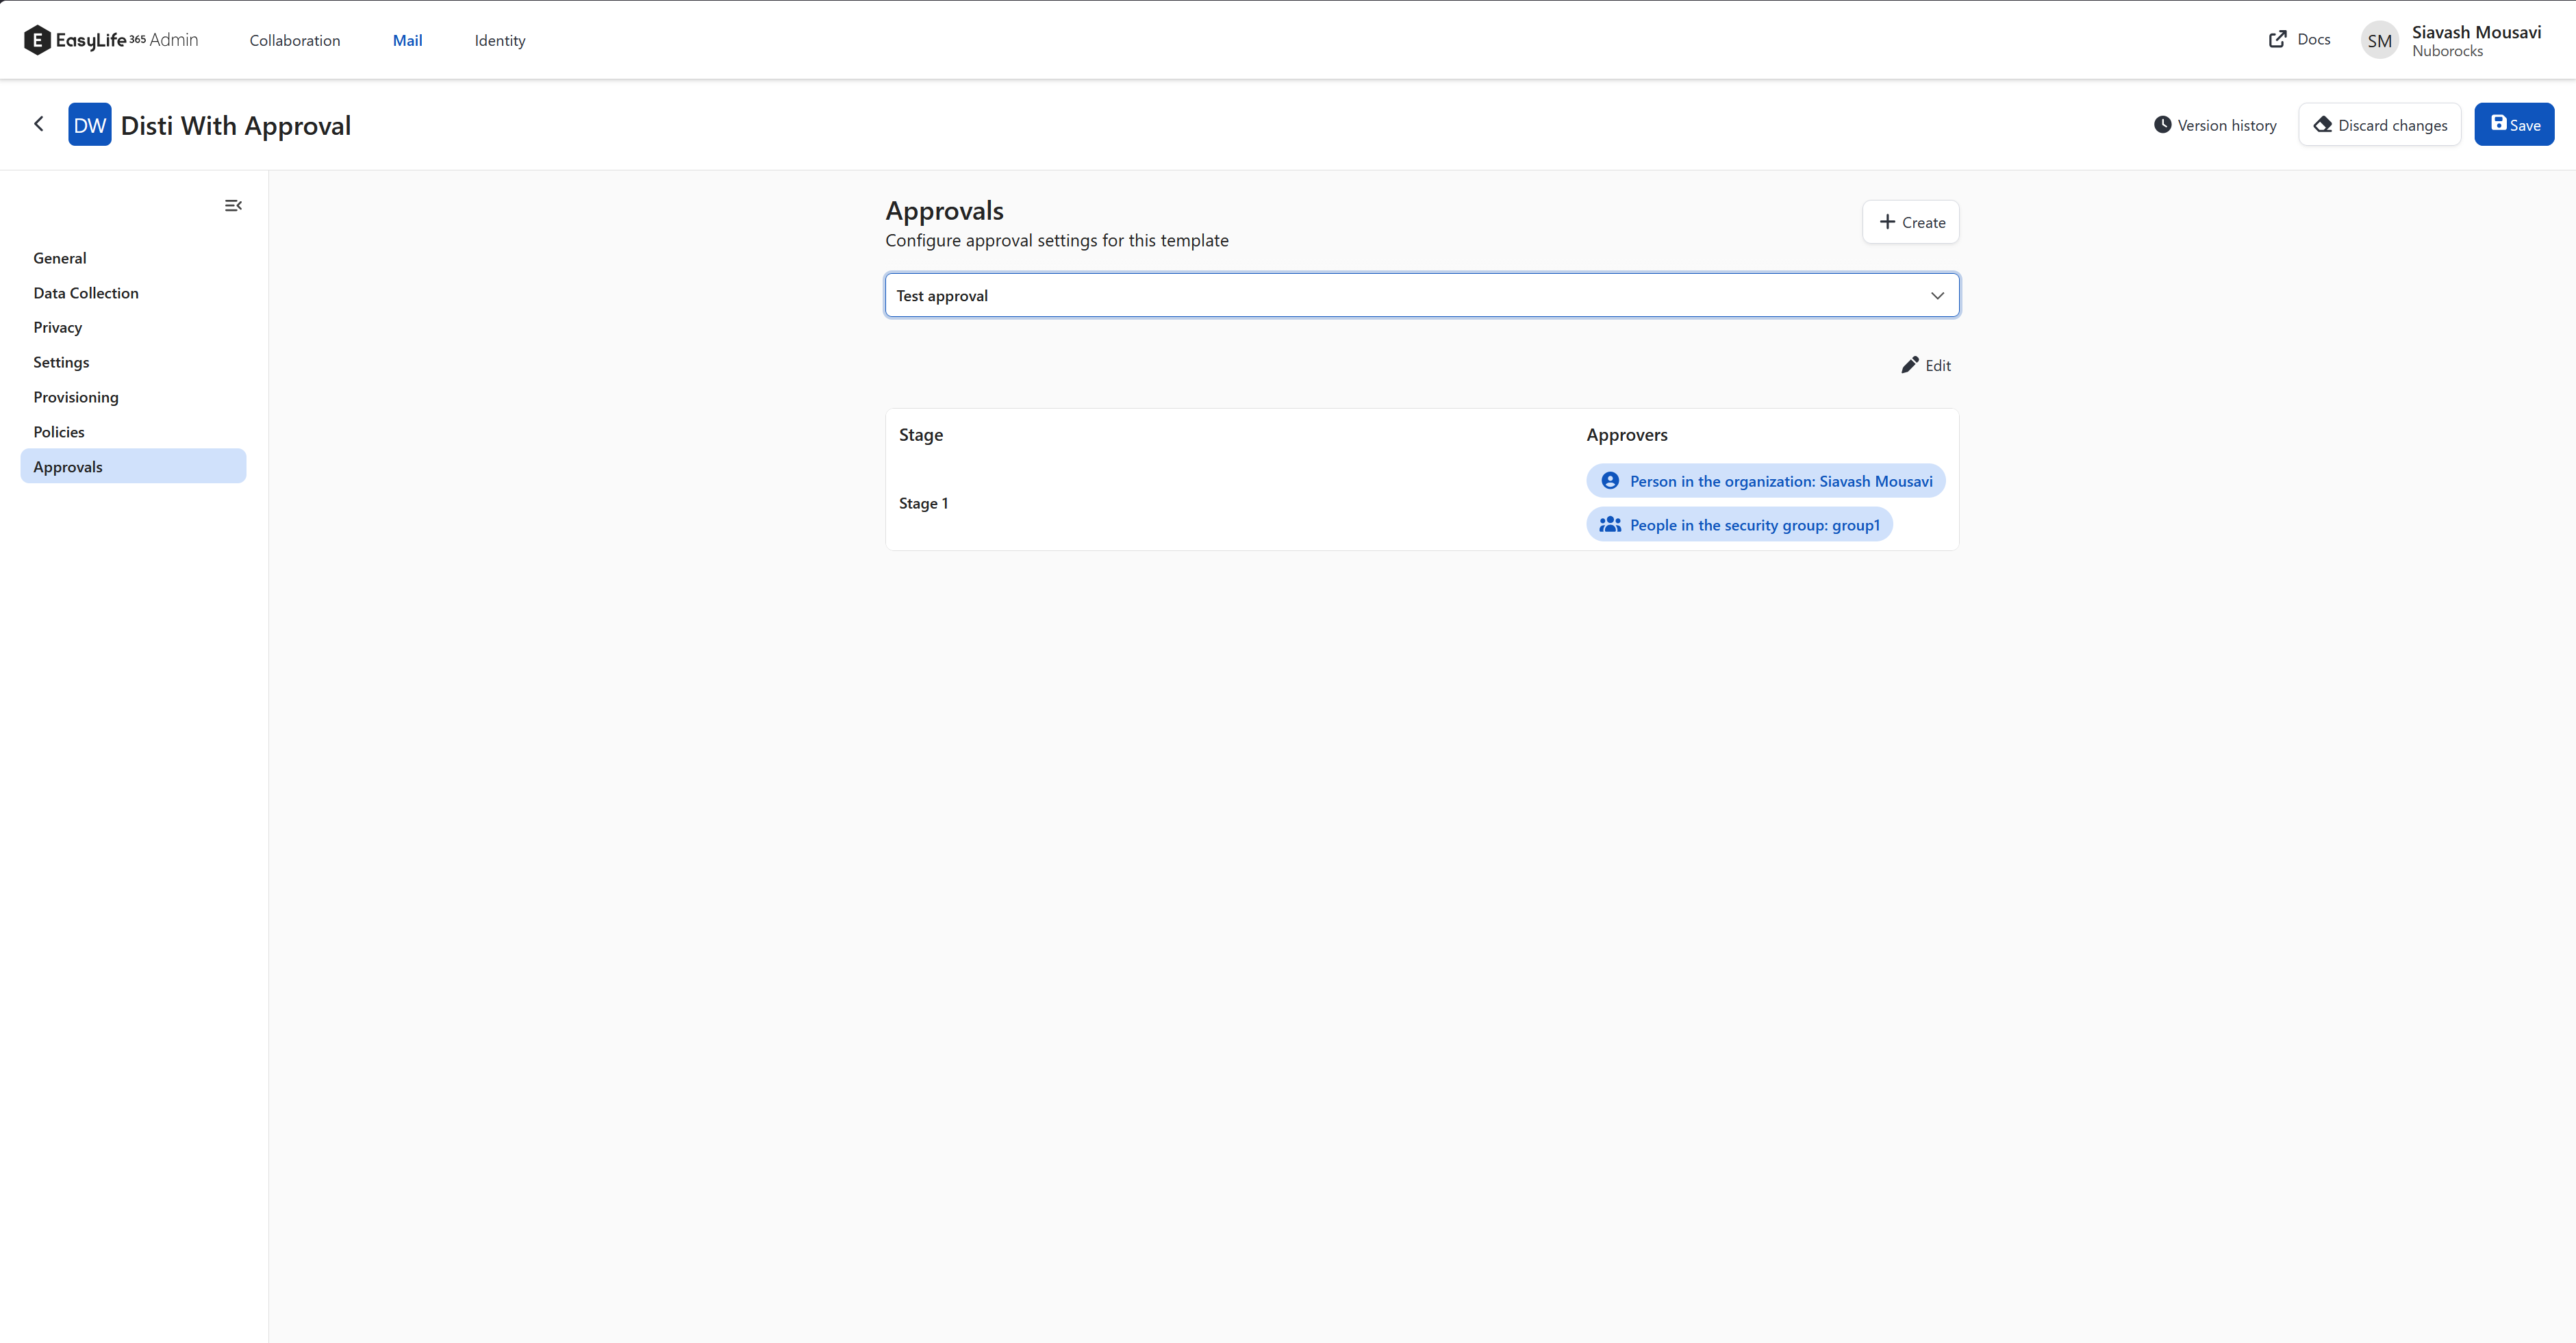
- Pick a workflow from the dropdown. None means the template provisions without an approval.
- Select Save.
Once a workflow is selected, the tab shows a read-only summary of its stages and approvers, so you can confirm what you attached without leaving the template. A stage with no approvers is called out here with a warning, because such a stage never completes.
Use Edit in the summary table's toolbar to open the selected workflow, change it, and come back to the template.
Linking a workflow whose Status is inactive does not block provisioning. Inactive workflows are skipped, the request is approved automatically, and the resource is created right away.
Creating a workflow without leaving the template
If the workflow you need does not exist yet, you no longer have to abandon the template to create it.
- On the template's Approvals tab, select Create in the page header.
- The template is suspended with everything you have typed so far, and the new approval workflow opens. Its header names the template you are creating it for.
- Fill in the General and Workflow tabs and save.
- You are returned to the template's Approvals tab. Your edits are still there and the new workflow is already selected.
- Select Save to save the template.
The same button is on the Policies tab, where it creates a policy for the resource type this template targets.
The workflow is saved for real in step 3, while the template is still a draft. If you then abandon the template, the workflow remains and stays available to other templates. Leaving the workflow without saving returns you to the template with your edits intact and nothing selected.
What your users see
When a user creates a resource from a template that is linked to a workflow, the creation wizard in the EasyLife 365 Mail App ends with a Request step. The user enters a Description explaining why the resource is needed. The text is required and must not exceed 2,000 characters; longer text is refused with a validation message rather than silently cut off.
Approvers see that text as Reason for creation on the request.
Managing requests
Administrators can review, approve and reject requests for the whole tenant under Manage → Approval Requests. See Approval Requests.